
Designing Protocols
Protocols are templates for running experiments. They consist of a series of nodes connected by shared labware and are managed in the Design view.
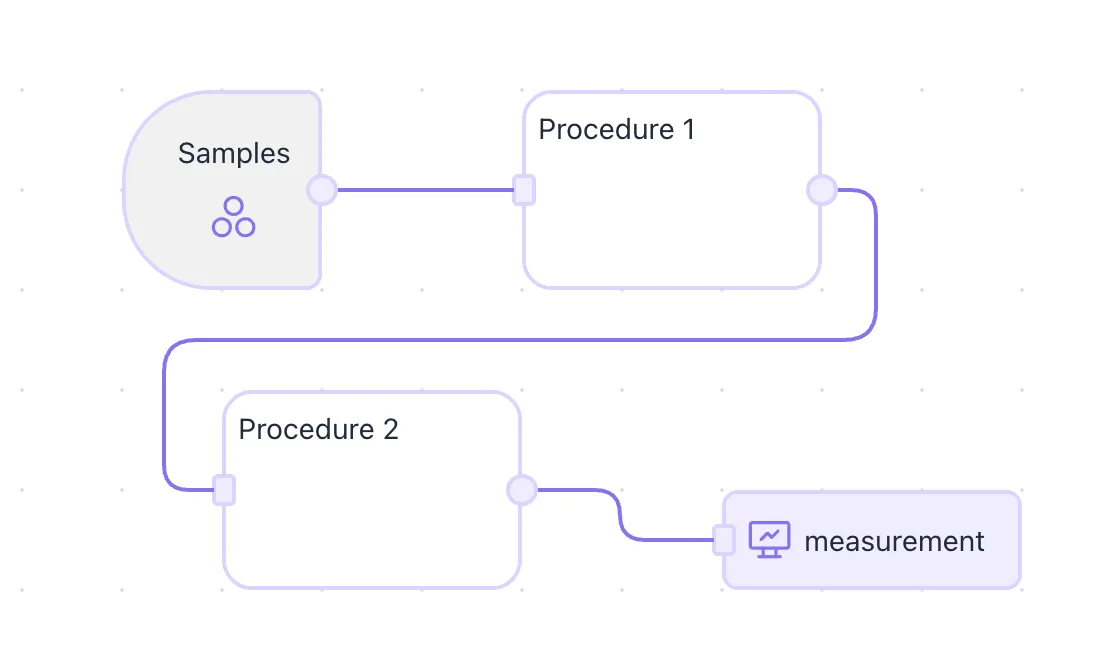
This section will focus on high-level protocol design and on how to add and connect nodes to build workflows. In the next sections, we will take a closer look at the nodes themselves.
Create a new protocol
Section titled “Create a new protocol”Start creating a protocol by clicking the “New protocol” button on the design page. A protocol settings window opens, and you can enter the basic info: name, description, ownership, one category, and one or more tags. Protocol name and ownership are the only mandatory fields; the others are optional and help you describe, search for, or filter the protocol.
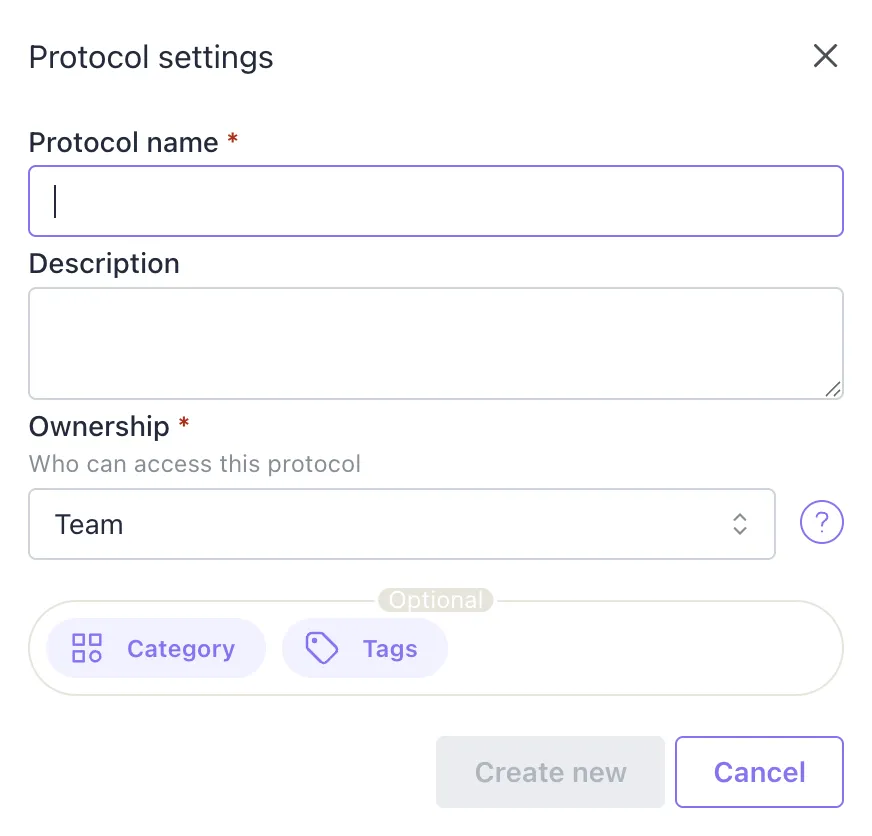
Ownership
Section titled “Ownership”A protocol can have one of two ownership types: private or team. Private protocols are yours; only you can see and edit them. Team protocols, on the other hand, are visible to your entire team, and anyone on the team can use or edit them.
If you’re a member of a team and leave, all team-owned protocols remain with the team; you can’t take them with you, even if you created them. Private protocols remain private and are attached to your account, whether you’re part of a team or not.
You can change a private protocol’s ownership to a team, effectively sharing it with the team, but you cannot change a team protocol to private.
Adding nodes
Section titled “Adding nodes”Each protocol is built from one or more nodes. To add nodes, open the node library in the top-left corner of the protocol canvas. From there, drag and drop new nodes onto the canvas. You can also access a list of your favorite saved procedure nodes for reuse.
Types of nodes
Section titled “Types of nodes”Samples: These nodes contain one or more labware items. These labware items are treated differently from other labware in the protocol because they are considered to contain samples, and their contents are tracked throughout the workflow. Sample nodes do not include any processing steps.
Procedures: Procedures include labware and a series of steps applied to one or more labware objects in a specific order. The bulk of the workflow is usually made up of procedures, as these are the only nodes that contain processing steps. We will focus on procedures in the next section.
When you build your protocol, we recommend splitting workflows into procedures that mirror real-world lab actions. These can include cell seeding, sample preparation, bead cleanup, and more. This keeps each procedure reasonably sized and makes the entire workflow easier to visualize at a glance.
Measurements: Measurement nodes generate data. They resemble a plate reading or the process of running samples through a chromatography system. Measurements are the only way to upload results to the workflow. Each labware item added to a measurement node can have result data attached.
Measurement nodes do not have steps; however, a device category can be selected and measurement parameters specified. These parameters can include flow settings for chromatography, image acquisition settings for microscopy, or a thermal profile for a qPCR device.
Connecting nodes
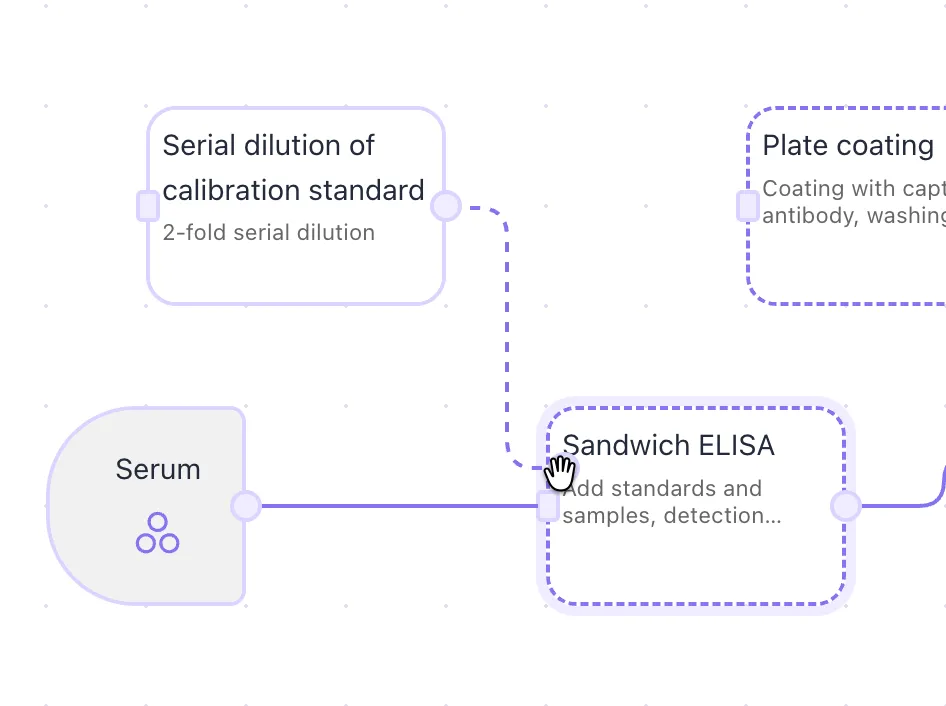
Section titled “Connecting nodes”Nodes are connected via labware. A tube from a sample node can be brought to a procedure for processing. After the procedure, the same sample can move to another procedure or to a measurement node. These node connections naturally define the nodes’ execution order.
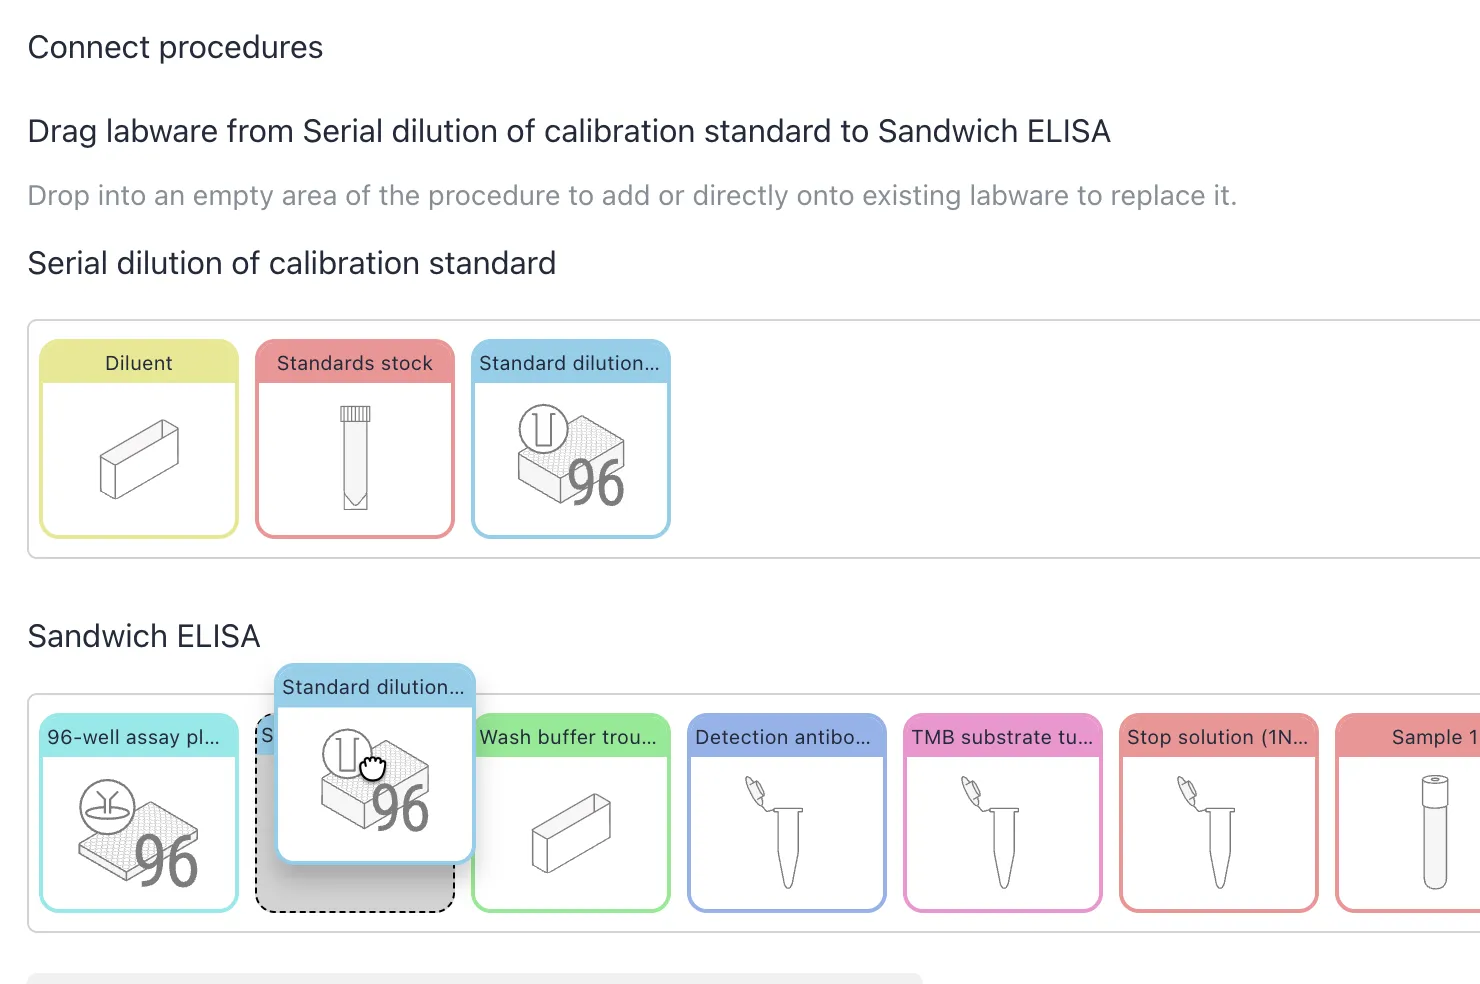
To connect nodes, drag the circular output labware handle from one node and drop it onto another. A connection window opens, showing labware from both nodes. You can drag and drop labware from the connecting node to the receiving node. If you drop the labware onto an empty area on the receiving node, it will be copied to that node. If the connecting labware shares a labware type with some of the existing labware on the receiving node, you can drop the connecting labware on top of the existing labware, and it will replace it.
Save as/Fork a protocol
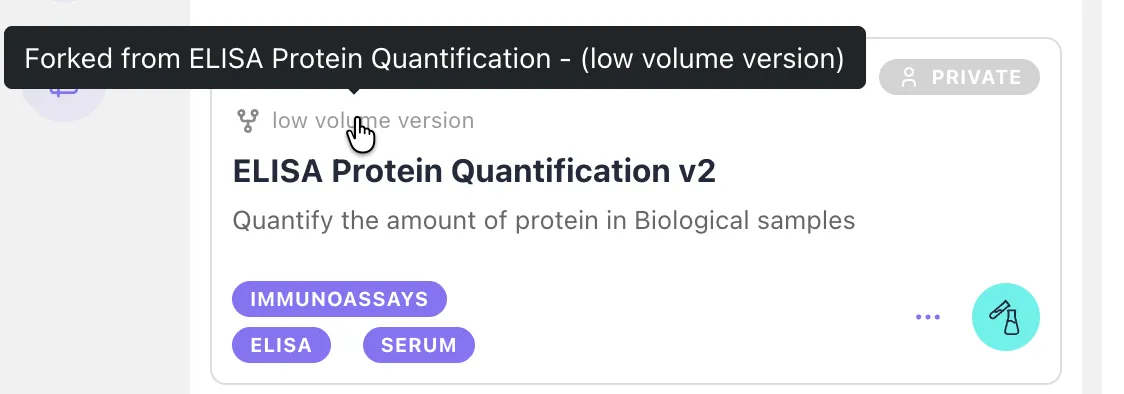
Section titled “Save as/Fork a protocol”Changes to any part of the protocol are saved instantly. If you plan to make a major change to a protocol, we recommend saving a new version (or forking) the protocol in case you want to revert to the previous version. You can find the “Save As” option in the protocol menu by clicking the “…” button on a protocol card. Give the new version a unique name and, optionally, a fork note that briefly describes what has changed. If you have access to the parent protocol (you or your team owns it), you can see the parent protocol and the fork note on the protocol card.
Sharing a protocol
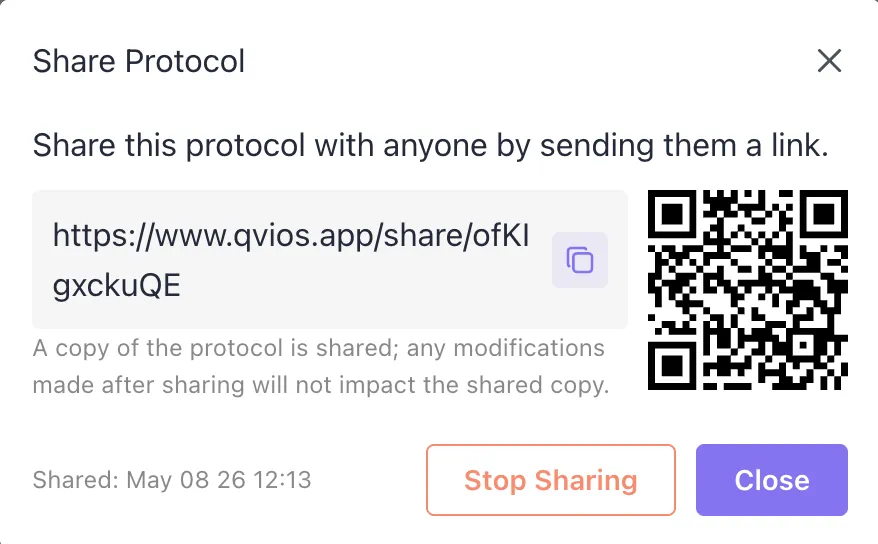
Section titled “Sharing a protocol”Everyone on the same team can access all team-owned protocols. If you want to share a protocol outside your team, use the “Share” option in the “…” protocol menu. The first time this option is used for each protocol, a unique link is created (with a QR code that points to it). Anyone with the link can get their own copy of the protocol. Once the protocol is shared, the “Share” option will display the same share link; no new link is created each time the share window is opened.
Shared protocols are not updated after sharing
Section titled “Shared protocols are not updated after sharing”When you share a protocol, an immutable snapshot of the current version is stored and made available to anyone who uses the link. If you update the protocol after sharing, the changes do not apply to the shared version. Likewise, if someone gets a copy of your protocol and makes their own changes, your original version remains unchanged.
Who can share
Section titled “Who can share”You need a Team plan to use the share protocols function. Only team members with manager- or admin-level access may share protocols outside the team.
How to stop sharing
Section titled “How to stop sharing”If you no longer want to share a protocol, you can stop sharing it in the share menu. When you stop sharing, you can leave a message that will be displayed when someone uses the link to access the shared protocol.